Image Background Remover For Transparent PNGs

Separate the subject from a busy backdrop with the PixVerse image background remover. Remove Background takes a JPG, PNG, or WebP image and produces a transparent PNG, ready to place into a new composition. Start with a product photo, portrait, or creative asset, then review the outline before using the cutout in a listing, presentation, or campaign layout. The Mini App keeps the task focused: upload an image, remove its background, and download the subject for the next stage of production.

Image Background Remover: From Photo To Reusable Asset

Background removal changes what surrounds a subject. A transparent image can sit on a colored layout, a presentation slide, or a separately designed backdrop. Start by deciding which visible details belong to the subject.

Before background removal

Create A Transparent PNG From A Product Photo

A product photographed on a desk carries two kinds of information: the item itself and the space around it. Remove Background separates the foreground from that setting and exports a transparent PNG. Use the cutout as the starting asset for a product card, a promotional composition, or a collection graphic. Review handles, straps, narrow gaps, and the contact edge before placing it into the finished design. A consistent margin around the item makes the same cutout easier to reuse across different layouts without crowding its silhouette.
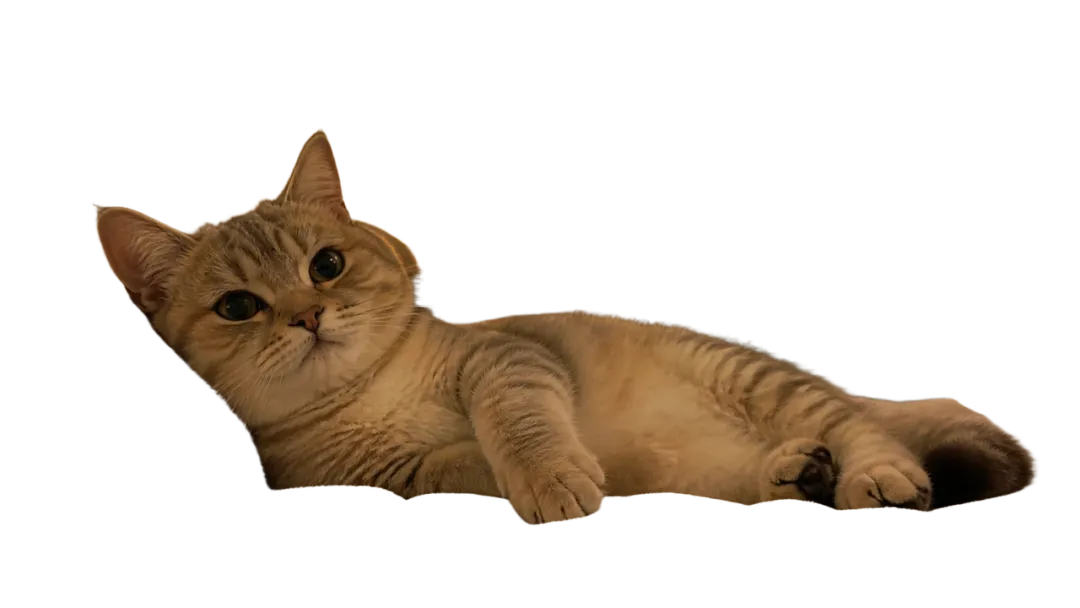

After background removal

Give Portraits A New Place In The Layout

A portrait cutout makes the person independent of the original scene. Place the transparent PNG beside a quotation, inside an announcement graphic, or over a background prepared in a separate design application. The source photograph still matters: a clear face, visible shoulders, and separation from surrounding objects make the intended subject easier to identify. Inspect hair, glasses, clothing edges, and any object the person is holding. Keep the original photograph alongside the cutout so the design team can compare the complete scene with the isolated subject.

Prepare Photos For An AI Background Remover

Choose a source that clearly shows what should remain. The background remover accepts familiar image formats, while thoughtful source selection makes the resulting cutout easier to assess and incorporate into a design.

Upload JPG, PNG, Or WebP

Upload one image in JPG, PNG, or WebP format, with a file size up to 10 MB. Use the original asset rather than a screenshot containing interface controls, captions, or surrounding page elements. An uncrowded source helps keep the task specific. For a product collection, prepare individual source photos and review each item separately so small components receive attention before the final composition is assembled.

Keep The Full Subject In View

Leave breathing room around the subject when preparing the upload. A cropped-off shoe, handle, or sleeve is absent from the source photograph; removing the backdrop addresses a different task from rebuilding missing content. Choose the version with the complete outline when one is available. For groups of objects, decide whether the image should retain the whole arrangement or whether a single-item photograph would be clearer.

Separate Background Removal From Scene Design

Remove Background creates the cutout. A replacement background, colored panel, shadow treatment, and text layout can then be composed in a design workflow. Treat these as separate creative decisions: first establish the subject boundary, then decide where the subject belongs. This keeps the image background remover focused on image isolation rather than turning the page into a promise of unrelated editing features.

How To Use The Image Background Remover

Move from the source photograph to a checked cutout in a short sequence. Keep the original file available during review, especially when the photo includes fine edges, transparent materials, or several overlapping objects.

Open Remove Background

Enter the Remove Background Mini App and choose the image to process. Confirm that the correct photo is selected before generation. A clear filename helps distinguish different angles of the same product or multiple versions of a portrait during a larger creative project.

Upload The Source Image

Add a supported JPG, PNG, or WebP up to 10 MB. Check the preview for the full subject, including any details near the edge of the frame. Use a separate source file for a different composition rather than relying on the background removal step to change the viewpoint.

Generate The Cutout

Run the background removal step to isolate the foreground. Compare the result with the source and examine areas where subject and background share similar tones. Pay attention to the space between fingers, handles, branches, or other thin structures that define the object.

Download And Place The PNG

Download the transparent PNG and open it in the intended layout. Check its outline against both a light and a dark surface. Keep enough space around the subject for the design, then save the original and cutout together for future revisions or alternate campaign formats.

Transparent Backgrounds For Product And Creator Work

A reusable cutout is useful when the same subject needs several visual settings. The examples below describe composition choices after removal, with the transparent PNG acting as the common source asset.

Build A Cohesive Product Collection

A collection page can contain products photographed in different rooms or on different surfaces. Isolate each item, then place the cutouts into a consistent layout in the design stage. Match the apparent scale, spacing, and background treatment across the collection. Review each product against its source photo, including labels and small accessories, before finalizing the set. The image background remover supplies isolated assets; the layout establishes the collection style. That separation keeps product selection, cutout review, and visual merchandising understandable as individual tasks.

Prepare A Subject For A Larger Creative Workflow

A cleanly separated subject can become part of a cover design, presentation, or campaign concept. Compose the cutout on its intended background before using that finished image as a reference for an AI video generator. The intermediate composition determines where the subject sits and what surrounds it. Keep the transparent PNG available so the team can revise that arrangement without starting from the original scene each time. The background removal step stays distinct from animation, camera direction, and video generation.

Photo Background Removal: What To Check Before Handoff

Review the cutout as an asset, not just as a preview on one background. A short visual inspection makes the handoff to a designer or editor more specific and easier to repeat.

Inspect Fine Edges

Look closely at hair, fur, fabric fibers, thin straps, and the spaces between objects. Compare these areas with the original photo, then view the cutout at the size used in the final design. A small thumbnail and a large promotional image put different demands on the same outline, so check the intended placement rather than judging only a zoomed-out preview.

Check Transparent And Reflective Materials

For ecommerce images, compare the transparent cutout on the actual background color used by the product page. A white background can reveal a different edge issue from a dark color. For portraits and profile pictures, inspect the hair against both. This AI background eraser creates the transparent subject asset; background color and layout are chosen in the separate design stage.

Preserve A Reusable File Set

Store the source image, transparent PNG, and finished layout as separate assets. Use filenames that identify the subject and version. The cutout can then be reused for a different background or layout without confusing it with the original photograph. This simple file structure also makes it easier for another team member to review or replace an individual asset later.

Frequently Asked Questions

Remove Background produces a transparent PNG from an uploaded image. That file separates the visible subject from its original backdrop so it can be placed into a new composition. Use the cutout in a product graphic, portrait layout, or presentation, and keep the original photo for comparison during design review. The isolated subject and the completed layout remain separate assets, each with a different role in production.

DNV ISO/IEC 27001 Information Security Management System certification mark

ISO/IEC 27001 Certified Information Security Management

PixVerse maintains an information security management system certified by DNV to ISO/IEC 27001, supporting a structured approach to protecting information across our operations.

Give The Subject A Clearer Place

Start with the image that best shows the subject. Open Remove Background, upload the source, and create a transparent PNG for the next composition. Keep the original photo and cutout together, review the outline, and carry the selected asset into the design workflow.